





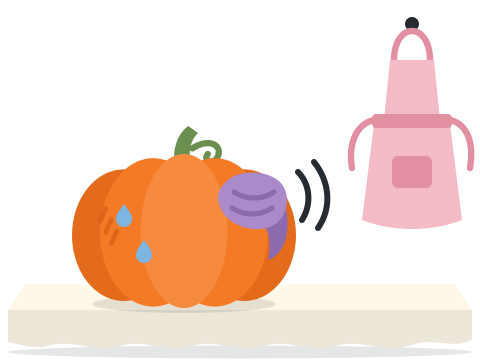



The Munchkins' Pumpkins

A family pumpkin party for grown-ups & kids

Pumpkin Party Carve, Paint & Create

Pick a pumpkin, choose your style, and make something fun together.

What supplies do I need?
A carved jack-o'-lantern with triangle eyes and a toothy grin

LED lights only. No flames!

Three party rules

  • Grown-ups do every pumpkin cut and poke.

    Kids pick designs, draw, scoop with a spoon and paint.

  • LED lights only.

    Real candles stay off the tables. Grown-ups handle batteries.

  • Teeth stay away from dogs.

    Push-in teeth too, even on finished pumpkins.

How the party goes

  1. Set up

    Cover the tables, set out supplies and test the lights. Checklist

  2. Pick a path

    Carve with a grown-up, or paint. Carving and painting get separate tables.

  3. Make it

    Follow the steps, one card at a time.

  4. Dry & light

    Painted pumpkins rest on the drying table. Grown-ups add LED lights.

  5. Show & tidy

    Pumpkins go on display with name cards. Kids wipe tables and rinse brushes. Grown-ups wash, dry and pack away the cutting tools.

Who does what

Kid jobs

  • Choose the design
  • Draw the face
  • Scoop with a big spoon
  • Paint
  • Help tidy up: wipe tables, rinse brushes

Grown-up jobs

  • Every pumpkin cut and poke
  • Saws, pokers and the power saw
  • Batteries and lights
  • Pointed push-in teeth
  • One grown-up at each cutting spot
  • Washing and packing away sharp tools

Supply checklist

Tick off what you have before everyone arrives. An empty box means "check it's here", not "buy it".

0 of 15 ready

Ordered already bought, find it in the delivery On hand confirmed at home Check at home find it or borrow it Arrange people & places
Pumpkins & work area
Design & carving
Paint station
Light & finish
People & clean-up
What's already been ordered?

These counts come from order screenshots, so check them in person before you set things out.

Lights
LED tea lights (50-pack), flame-style pumpkin lights with remote and timer, and color-changing lights with remote. Real wax tea lights were ordered too. Keep those off the activity tables.
Carving kits
2 deluxe 5-piece kits and 1 nine-tool kit with 16 patterns
Scraping
Pumpkin glove scraper kit (looks like 2, so check the box)
Patterns
A stencil book with 50+ designs, and 2 packs of 12 stencils
Teeth
Silly push-in teeth, one pack of 10
Power tool
1 pumpkin power saw, for grown-ups only, after reading its manual
Paint
Paint and brushes are already at home. Check the paint type and label.

Meet the tools

Match these to the tools in your opened kits. If a package says something different, follow the package.

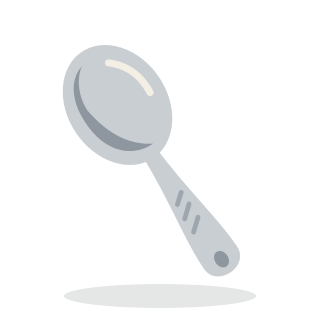
  • A big sturdy kitchen spoon

    Big spoon

    Kid job

    The easiest scooper for kids. Take out loose seeds first, then scrape in short passes. Pulp goes in a bowl.

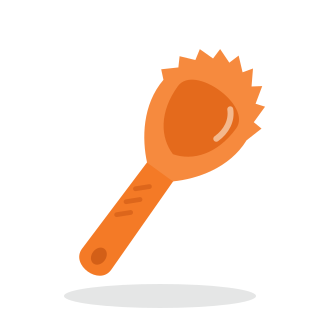
  • A plastic pumpkin scoop with a jagged scraping edge

    Scoop / scraper

    Together

    From the carving kits. Scrape the inside wall in short passes until the face side is about 1 inch thick.

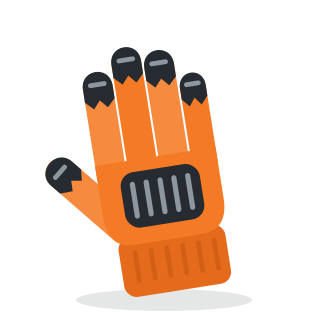
  • An orange work glove with ridged scraper pads on the fingers

    Glove scraper

    Grown-up only

    Check the fit and the package directions. Put on the gloves as directed, then rub the scraper against the inside wall to loosen pulp.

    Heads up: the liner is latex, so use a spoon if latex is a problem. It is not a cut-proof glove. See the maker's page

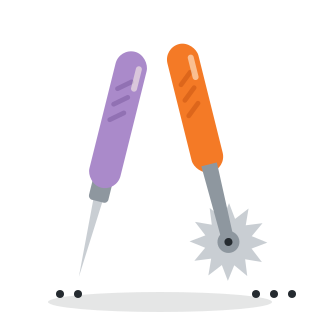
  • A pattern poker with a short metal point, and a spiked transfer wheel

    Pattern poker & transfer wheel

    Grown-up only

    Tape the pattern flat, then poke dots close together along every line. Take off the paper and join the dots with a marker.

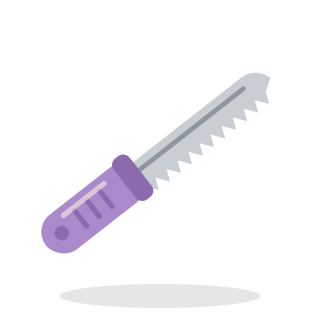
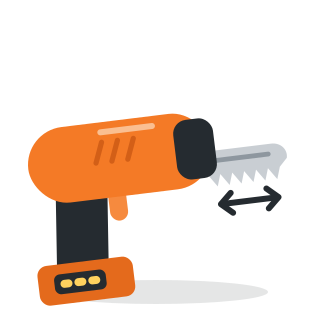
  • A small pumpkin saw with a thin jagged blade and a purple handle

    Small pumpkin saw

    Grown-up only

    Hold the handle and use short, gentle strokes. Keep your other hand out of the blade's path. Don't twist or force it. For corners, stop and turn the pumpkin.

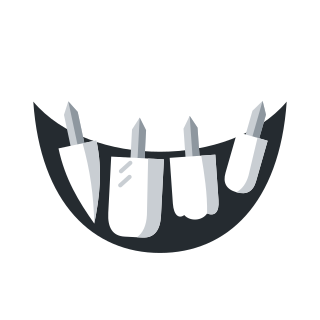
  • Four silly white push-in pumpkin teeth, each with a spike on top for pushing in, shown in a grin

    Push-in teeth

    Together

    After a grown-up cuts the mouth, press the pegs into the cut edge as the pack shows. A grown-up puts in any pointed pieces.

    Keep away from dogs, even on finished pumpkins.

  • A battery-powered handheld pumpkin saw

    Pumpkin power saw

    Grown-up only · optional

    Before using it, check the exact model, battery, blade fitting and what it's meant for in its manual. Switch off and remove the power before adjusting. No manual? Use the hand saws.

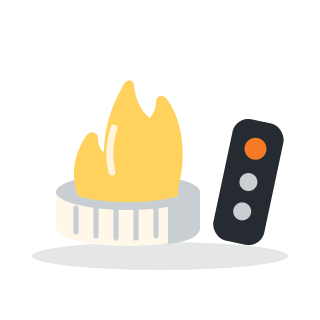
  • An LED tea light with a plastic flame-shaped bulb A flame-style pumpkin light with a small remote A color-changing light with a remote

    LED lights & remotes

    Grown-up sets up

    Put the batteries in the way the marks show, close the battery door tight, test the on/off switch, then try the remote. Pick a steady glow or a color. Timer and pairing buttons are different on each model.

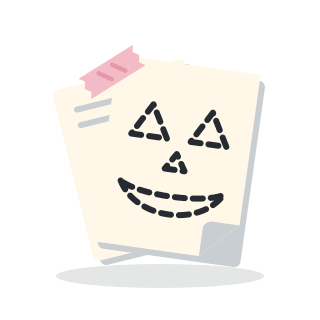
  • Paper carving patterns with a dashed face outline and tape

    Patterns & stencils

    Kids choose

    Pick a face with big shapes. Thin lines and tiny bits break easily. Or make your own in the Face Lab.

  • Paint pots, two brushes and a water cup

    Paint & brushes

    Kid job

    A grown-up checks the paint type, age guidance and label directions first. Then paint away.

Not at the activity tables

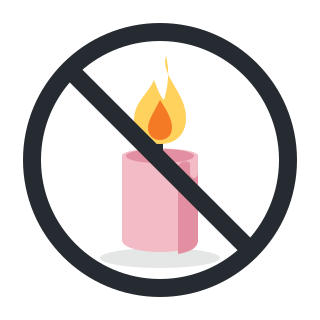
  • A real candle, crossed out

    Real candles. Use the LED lights instead. No flames needed.

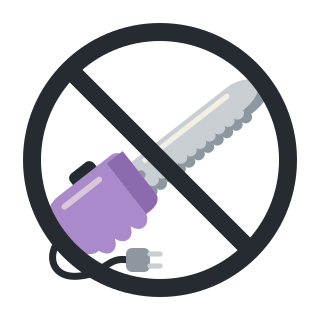
  • An electric kitchen knife, crossed out

    Electric kitchen knives. The turkey slicer and electric carving knife are for food, not pumpkins. They stay in the kitchen.

Carve with a grown-up

Kids choose and draw. Grown-ups do every pumpkin cut and poke. Dry your hands, the pumpkin and the tools first.

Watch a carving demoDesign a face first

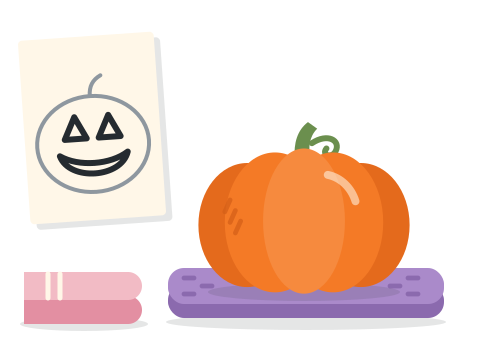
  1. A clean pumpkin on a non-slip mat, a cloth, and a paper sketch of a simple face with big triangle eyes.

    Step 1 of 6

    Set up

    Together

    Wash and dry the pumpkin. Put it on a steady, non-slip surface. Choose a simple face with big shapes.

    More detail

    Dry hands, pumpkin and tools before you start. Use a covered, well-lit table with a non-slip mat or tray. Keep the carving table apart from the painting table.

    Need a face? Make one in the Face Lab and print it.

    Why?

    Big shapes are easier to cut and less likely to break. Dry hands and a dry pumpkin help stop tools slipping.

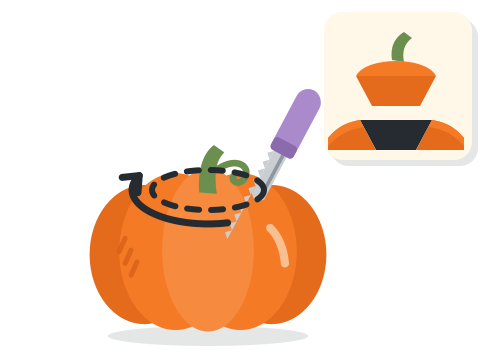
  2. A dashed circle around the stem shows where to cut the lid. The saw points inward, and a small picture shows the cone-shaped lid.

    Step 2 of 6

    Open the pumpkin

    Grown-up job

    Use a pumpkin saw to cut a hand-sized lid. Angle the cut inward so the lid has a ledge to sit on.

    More detail

    Short, gentle strokes. Keep your other hand out of the blade's path. Don't twist or force the saw.

    Some guides open the pumpkin from the bottom instead. Either way works. Just pick one and stick with it.

    Why?

    Cutting at an angle gives the lid a ledge, so it sits on top instead of dropping inside.

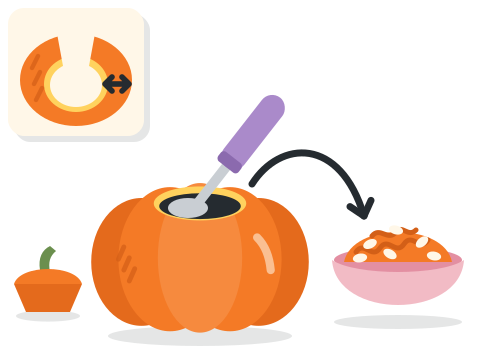
  3. A big spoon scoops inside the open pumpkin, a bowl holds seeds and strings, and an arrow shows the wall about one inch thick.

    Step 3 of 6

    Scoop it clean

    Kid job, with a big spoon

    Take out the seeds and strings. Scrape the face side until it's about 1 inch thick. Put tools down before helpers reach in.

    More detail

    Grab the loose seeds first, then scrape in short passes and drop the pulp in a bowl. A big sturdy spoon is the easiest kid tool.

    The glove scraper is a grown-up tool. Check the fit and the package directions. Its liner is latex, and it is not cut-proof.

    Why?

    A thinner wall is easier to cut and lets more light shine through.

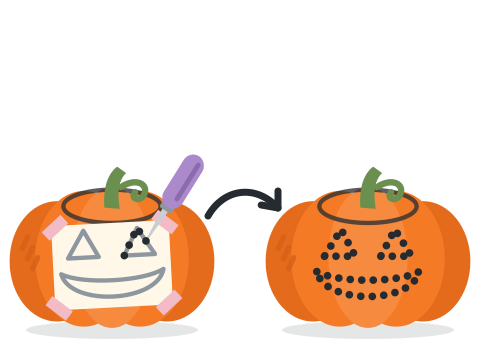
  4. Left: a paper pattern taped on the pumpkin while a poker dots the lines. Right: the paper is off and the face shows as dots.

    Step 4 of 6

    Add your design

    Kids draw · grown-ups poke

    Draw a face, or tape on a pattern. A grown-up pokes dots along the lines. Take the paper off and check the outline.

    More detail

    A grown-up tapes the pattern flat, folding or trimming the paper edges so it fits the round pumpkin. Then they poke dots close together along every line and join them with a marker.

    If your pattern comes with its own instructions, follow those.

    Why?

    The dots show exactly where to cut, so nobody has to guess.

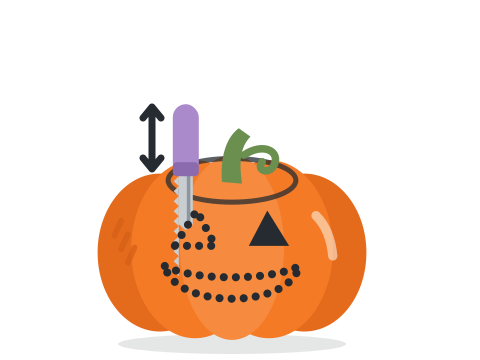
  5. The saw goes straight into a dotted eye line, with an up-and-down arrow for gentle strokes. One eye is already cut out.

    Step 5 of 6

    Cut slowly

    Grown-up job

    Follow the pattern's order, or cut the small details first. Use gentle strokes. No hands inside while cutting.

    More detail

    Hold the handle and keep strokes short and gentle. Keep fingers away from both sides of every cut. For corners, stop and turn the pumpkin.

    Hard to cut? Stop instead of pushing harder. Check the blade isn't bent, and scrape the wall thinner.

    Why?

    Small details are easier while the pumpkin is still strong. Forcing a saw is how blades bend and slip.

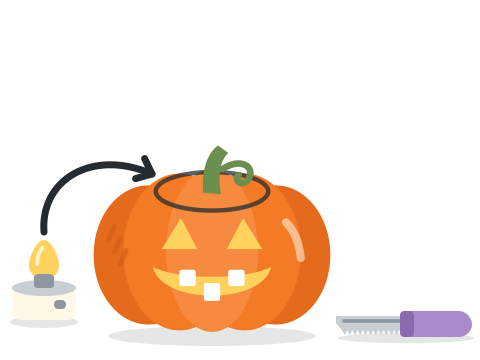
  6. The finished pumpkin glows with an LED light inside and has push-in teeth. The saw lies flat on the table.

    Step 6 of 6

    Reveal & light

    Together · grown-ups do pointed teeth & lights

    Put the saw down. Gently push out the loose pieces. A grown-up recuts any that stick. Add teeth if you like, then an LED light.

    More detail

    Never pry with the saw. For push-in teeth, follow the pack directions. A grown-up puts in any pointed pieces.

    For the light, a grown-up fits the batteries, closes the battery door, switches it on, then sets it inside.

    Why?

    LED lights don't need a flame, so there's no fire at the table. Teeth stay away from dogs, even on finished pumpkins.

Paint a pumpkin

An easy no-cut option. Keep the pumpkin whole. There's no need to scoop it out.

Watch a painting exampleDesign a face first

  1. A cloth wipes the pumpkin on a covered table, with an apron nearby.

    Step 1 of 6

    Clean & dry

    Together

    Wipe off any dirt and let the pumpkin dry completely. Cover the table and put on an apron.

    More detail

    Keep the painting table away from the carving table. Old shirts work as aprons.

    Why?

    Paint sticks better to a clean, dry pumpkin.

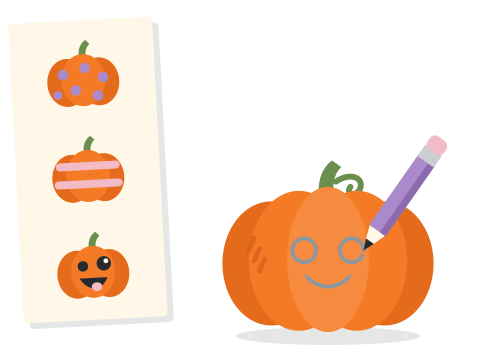
  2. A paper with small idea sketches of dots, stripes and a silly face, and a pencil lightly sketching a face on the pumpkin.

    Step 2 of 6

    Pick an easy idea

    Kid job

    Try dots, stripes, a silly face or a friendly monster. Sketch it lightly in pencil if that helps.

    More detail

    Big, simple shapes look great from across the room. Stuck? Try the Face Lab or browse the ideas.

    Why?

    A light sketch is easy to paint over and helps you fit the face on the pumpkin.

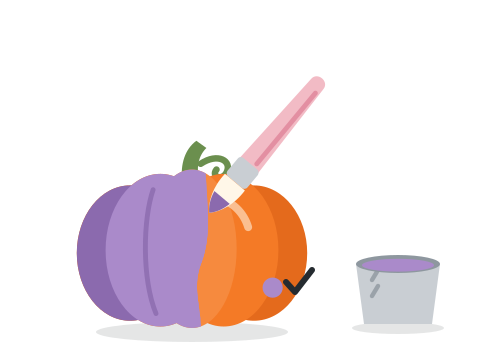
  3. The pumpkin is half painted purple, a brush is mid-stroke, and a small test spot on the side has a check mark.

    Step 3 of 6

    Paint thin layers

    Kid job · grown-up checks the label

    Use paint that suits the child's age and the pumpkin. Try a small spot first. Thin coats help stop drips.

    More detail

    A grown-up reads the paint label first. Dab a small test spot to see how it covers, then paint a thin coat. Two thin coats beat one thick one.

    Why?

    Thick paint is more likely to drip and takes longer to dry.

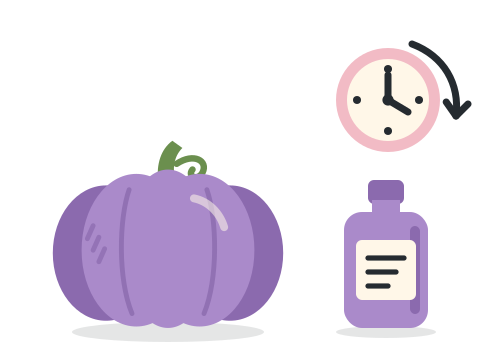
  4. The fully painted purple pumpkin beside a clock and a paint bottle with a label.

    Step 4 of 6

    Let it dry

    Together

    Wait as long as the paint label says. Let one color dry before you paint details on top.

    More detail

    Drying time depends on your paint, so the label is the boss. Move the pumpkin to the drying spot with a name beside it. Good time to rinse the brushes.

    Why?

    Painting over wet paint smudges the color underneath.

  5. A brush tip adds the second dot eye to the purple pumpkin, which already has a smile and pink cheeks.

    Step 5 of 6

    Add the face

    Kid job

    Paint the eyes and a smile. A brush tip makes great dots. Keep paint away from mouths, and wash hands afterward.

    More detail

    Add cheeks, spots or stripes too. Let each color dry before painting next to it.

    Why?

    Paint is for pumpkins, not for eating, even the washable kind.

  6. The finished purple pumpkin with a happy face on a display shelf, with a blank name card in front.

    Step 6 of 6

    Show it off

    Together

    Let it dry all the way. Keep it indoors unless the paint says it's fine outside. Don't eat a painted pumpkin.

    More detail

    Keep the finished pumpkin dry. Put a name card in front so everyone knows who made it.

    Why?

    Rain and damp can make some paints run or rub off.

Ideas

Make up your own face, or borrow an idea below.

Face Lab

Mix and match a face, then print it. Carvers get a cutting pattern, painters get a guide to copy.

Your pumpkin face
How will you decorate it?
Eyes
Nose
Mouth
Pumpkin color
Extras
Pattern size

Big shapes are easiest to carve. Every shape here is chunky on purpose.

Pumpkin Parade

Add everyone's pumpkin from the Face Lab, see them side by side, then print all the name cards at once.

No pumpkins in the parade yet. Make a face in the Face Lab, then tap Add to the parade.

The parade is saved on this device only.

Ideas to borrow

These are ideas, not tested step-by-step projects. Times are our guesses. For any carving, grown-ups do the cutting.

Pumpkin questions, answered

Tap a question. Each answer comes with a picture or video to show you what we mean.

Which design should we start with?

Choose a face with big eyes and a wide smile. Thin lines and tiny shapes break more easily.

A paper sketch of a simple face with big triangle eyes next to a clean pumpkin.
How do I get a paper pattern onto a round pumpkin?

A grown-up tapes it down, folding or trimming the paper edges so it fits, then pokes dots along the design lines. Take the paper off and trace the dots.

A taped paper pattern being dotted with a poker, then the dotted face on the pumpkin.
Why is it so hard to cut?

Stop instead of pushing harder. A grown-up checks the tool is made for pumpkins, and scrapes the wall thinner where the face goes. Check for a bent or damaged blade.

A saw going straight into a dotted eye line, with an arrow for short, gentle strokes.
What if a piece won't come out?

Put the tool down and look for spots that aren't cut all the way through. A grown-up carefully recuts those. Never pry hard with the saw.

The finished carved pumpkin, with the saw set down flat on the table.
Can kids carve by themselves?

At this party, grown-ups do all the cutting and poking. Kids pick patterns, draw, scoop with a spoon, and paint. Painting is a full project of its own!

A brush painting a face on a purple pumpkin.
Do we need a real candle?

No. Use the LED tea lights or pumpkin lights. Keep loose batteries out of reach and close the battery doors tight.

An LED tea light with a plastic flame-shaped bulb and a small switch.
Can we paint instead of carving?

Yes! Keep the pumpkin whole and follow the painting steps. Let the paint dry between layers.

A pumpkin being painted purple in a thin coat.
Why is my paint sliding or rubbing off?

Let the pumpkin dry and try a small patch first. Follow the paint label. Washable paint can rub off or run when it gets wet, so keep the finished pumpkin dry.

A painted pumpkin drying beside a clock and a paint bottle.

Watch it. See it. Try it.

Two short videos from the people who make the tools and paint, and four picture guides. Grown-ups, take a quick look before the kids watch.

Carve Pumpkin Masters

Carving tips & a beginner demo

Tips, tricks and a beginner carving demonstration. Remember: at our party, grown-ups do every cut.

Our carving steps, in short
  1. Set up a dry, steady pumpkin.
  2. Grown-up cuts an angled lid.
  3. Scoop until the face side is about 1 inch thick.
  4. Draw or tape on a pattern; grown-up pokes dots.
  5. Grown-up cuts slowly with gentle strokes.
  6. Push out pieces, add teeth and an LED light.
Open on YouTube

Paint Crayola

A quick pumpkin-painting example

A short clip from a paint-kit maker, not a full lesson. Your paint may behave differently from theirs.

Our painting steps, in short
  1. Clean and dry the pumpkin; cover the table.
  2. Pick an easy idea; sketch lightly.
  3. Paint thin coats; test a small spot first.
  4. Let it dry as long as the label says.
  5. Add the face with a brush tip.
  6. Dry fully, keep it dry, don't eat it.
Open on YouTube

Picture guides

  • Pumpkin Masters picture guide

    Tool photos and illustrated steps. It opens the pumpkin from the bottom and uses a stiffened-paper pattern. Fine either way, just pick one method.

    Open the guide
  • Crayola monster painting project

    Photo steps for a friendly monster pumpkin. Great for ideas. Swap in materials that suit your group.

    Open the project
  • Halloween Moments glove scraper

    The maker's page, with demo videos. Use it to recognize the scraper, then follow the instructions in your kit.

    Open the maker's page
  • Hand safety for grown-up carvers

    Tips from the American Society of Hand Therapists on dry work areas, grown-up cutting and steady strokes.

    Open the tips (PDF)

Swipe or use the arrow keys.

The Pumpkin Parade